Part:BBa_J23107
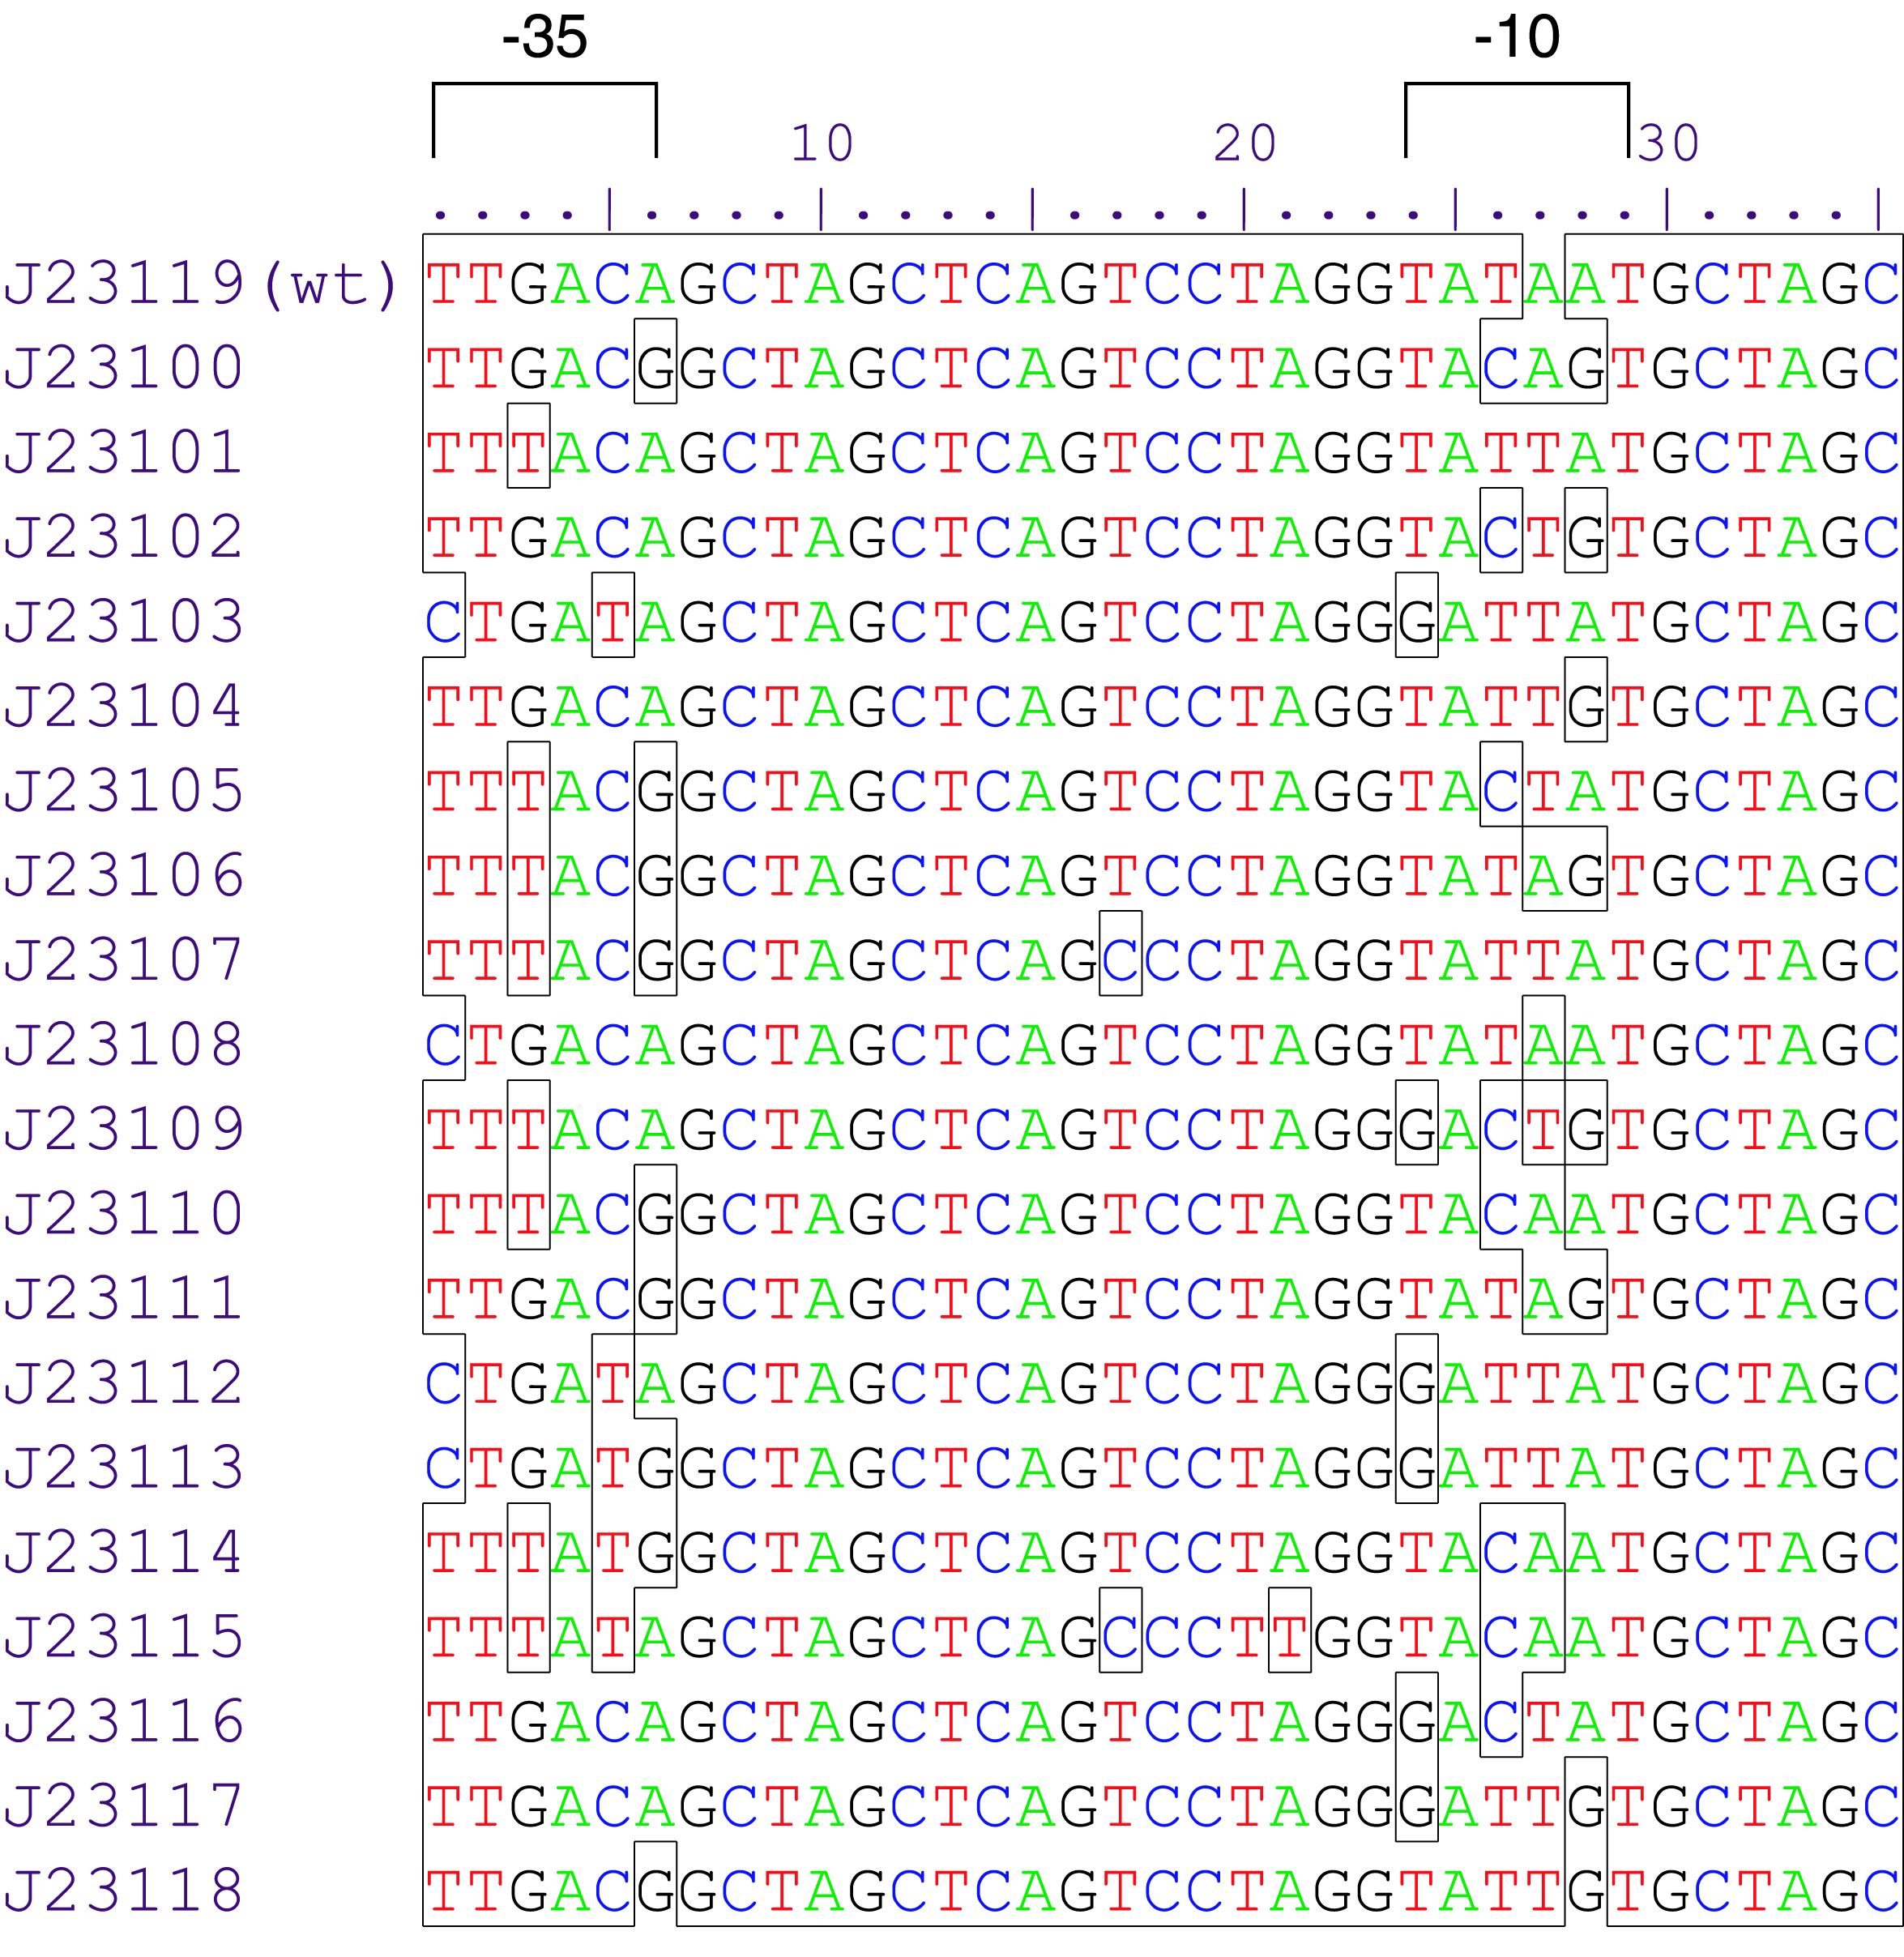
constitutive promoter family member
Variant RFP (au) J23112 1 J23103 17 J23113 21 J23109 106 J23117 162 J23114 256 J23115 387 J23116 396 J23105 623 J23110 844 J23107 908 J23106 1185 J23108 1303 J23118 1429 J23111 1487 J23101 1791 J23104 1831 J23102 2179 J23100 2547 |
Constitutive promoter family
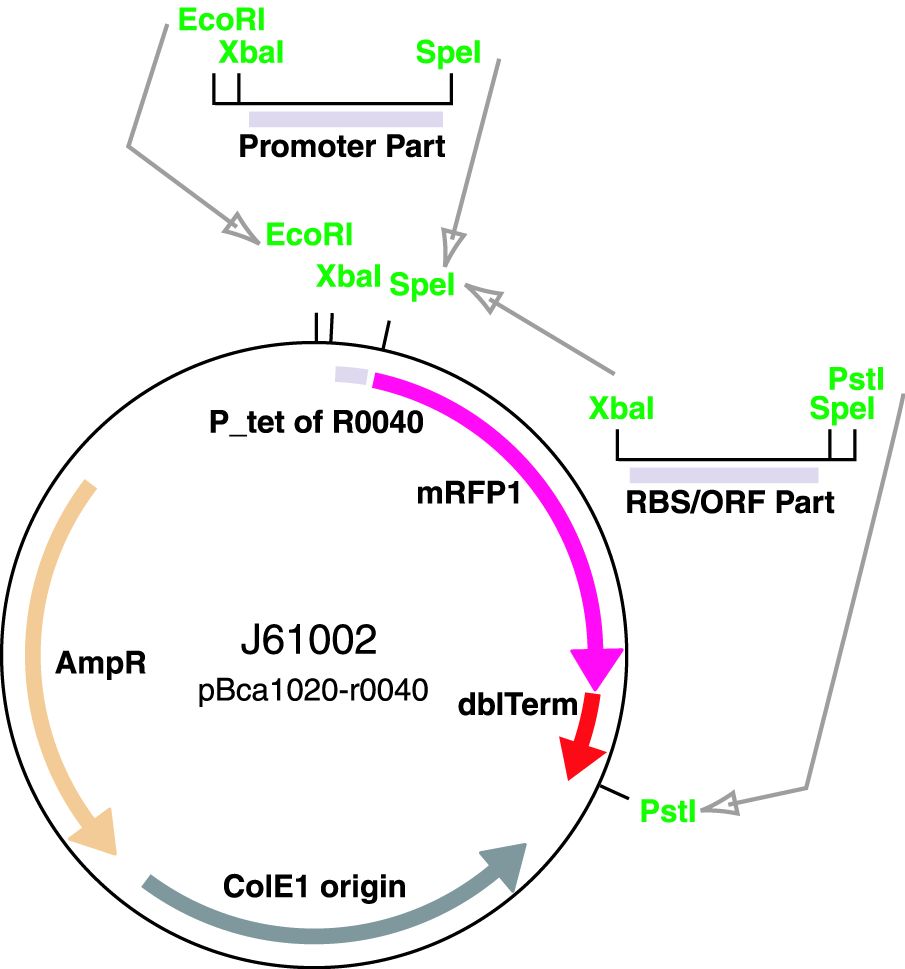
Parts J23100 through J23119 are a family of constitutive promoter parts isolated from a small combinatorial library. J23119 is the "consensus" promoter sequence and the strongest member of the family. All parts except J23119 are present in plasmid J61002. Part J23119 is present in pSB1A2. This places the RFP downstream of the promoter. Reported activities of the promoters are given as the relative fluorescence of these plasmids in strain TG1 grown in LB media to saturation. See part BBa_J61002 for details on their use.
These promoter parts can be used to tune the expression level of constitutively expressed parts. The NheI and AvrII restriction sites present within these promoter parts make them a scaffold for further modification. JCAraw
Sequence and Features
- 10COMPATIBLE WITH RFC[10]
- 12INCOMPATIBLE WITH RFC[12]Illegal NheI site found at 7
Illegal NheI site found at 30 - 21COMPATIBLE WITH RFC[21]
- 23COMPATIBLE WITH RFC[23]
- 25COMPATIBLE WITH RFC[25]
- 1000COMPATIBLE WITH RFC[1000]
iGEM 2020 QHFZ-China, new documentation (For Bronze)
Group: QHFZ-China iGEM 2020
Author: Yixian Yang
We measured BBa_J23100, BBa_J23107 and BBa_J23109 as a strong, moderate and weak promoter respectively in 2020. For all the experiments below, we use E. coli BL21(DE3) strain.
Part 1: Measurement with a reporter, sfGFP
Description
First, we measured the strength of the promoter by sfGFP BBa_K3457015.
Protocol
The gene circuit we used is as below:
The protocol is as below:
(1)Pick clones in good condition and put them into 500 μL LB medium containing antibiotics. Shake them to grow at 37℃ for 5~7 hours until the bacteria solution becomes turbid.
(2) Add 2mM iPTG into 3 mL LB medium containing antibiotics. Add 3 μL of the bacteria solution mentioned in step 1 to dilute the bacteria by the ratio of 1:1000. Shake the solution to grow the bacteria at 37℃ overnight.
(3) The bacteria solution was centrifuged, and the LB medium was removed. Then the bacteria were resuspended by PBS. 100 μL such solution was put into a well of a 96-well plate. The GFP fluorescence and OD600 were detected by microplate readers (Bio-Teck). The parameters are exciting light: 488 nm, light reception: 520 nm, gain 50.
(4) The value of PBS was deducted from the result above. GFP / OD600 was calculated.
Result
Setting the strength of J23109 as 1, the relative strengths of J23107 and J23109 were 4.4 and 12.0 respectively. Though they are not the same as the data at the top of this page, they worked well and the strength order of the three promoters was accordance and consistent with other research data. The difference may owe to the certain gene circuit and protocol.
Part 2: Measurement with CHAS 106094
Description
Second, we measured the strength of the promoter by CAHS 106094 BBa_K3457012. This year, we used CAHS 106094 to protect bacteria from freeze-drying and dry storage. We used different promoters to adjust the expression level of CAHS 106094 to study the relationship between the survival rate and CAHS 106094 expression level.
Protocol
The gene circuit we used is as below:
The protocol is as below:
【Day 1】Induction culture
(1) PPick clones in good condition and put them into 500 μL LB medium containing antibiotics. Shake them to grow at 37℃ for 5~7 hours until the bacteria solution becomes turbid.
(2) Add 2mM iPTG into 3 mL LB medium containing antibiotics. Add 3 μL of the bacteria solution mentioned in step 1 to dilute the bacteria by the ratio of 1:1000. Shake the solution to grow the bacteria at 37℃ overnight.
【Day 2】Freeze-dried
(1) If fluorescence induced by the iPTG is detectable in the control group (GFP), continue experimenting.
(2) Use spectrophotometer to measure the OD600 of the bacteria solution, OD600 = 1 equals to
109 cells. If the OD600 value is between 0.1 and 1, There is a linear relationship between
OD600 and bacterial density. Calculate the volume of bacterial solution for 109 cells by using
the formula V = 100 / (OD600 × Dilution ratio).
(3) Take out a measured amount of 109 cells and centrifuge it at 8000 rpm for 3 min. Then pour out the
supernatant.
(4) Resuspend the bacteria in a 15 ml tube with a pre-refrigerated 100 μL 3% glucose solution.
(5) Take off the cover of the tube and put the bacteria into the cold trap. Open the compressor of the lyophilization machine and freeze the shaking tube for 2 h at -70℃.
(6) Put the caky bacteria solution into the drying chamber of the lyophilization machine. Open the vacuum pump to
dry it in vacuum for 6h at 1 Pa vacuum degree.
(7) Turn off the vacuum pump, place it at seal box filled with silica-gel desiccant a for 2 days at room
temperature.
【Day 3】Room temperature storage
【Day 4】Detect the survival rate
(1) Add 1 mL of sterile water to the tube, vortex for 15 s, placed it at room temperature for 10 min.
(2) Adjust the density of the bacteria solution by gradient dilution, then spread 100 μL of the bacteria solution on
the LB plate.
(3) If the density above is not suitable, take 100μL of the solution and spread it on the LB plate after several
gradient dilutions.
(4) Culture the bacteria overnight at 37℃.
【Day 5】Cell Count
(1) Take out the LB plate and take photos to record experimental results.
(2) Use the automatic cell counting function of Image J to count the colone number on the LB plate, then compare the
results between each group.
Result
As expected, J23100 is the most potent promoter and it gave the best survival rate. J23107 is the second and J23109 seemed too weak to express enough CAHS 106094. In conclusion, J23100 and J23107 is effective in this situation, but J23109 is not.
USTC_2009's MEASUREMENT
|
•••••
University of Texas at Austin iGEM 2019 |
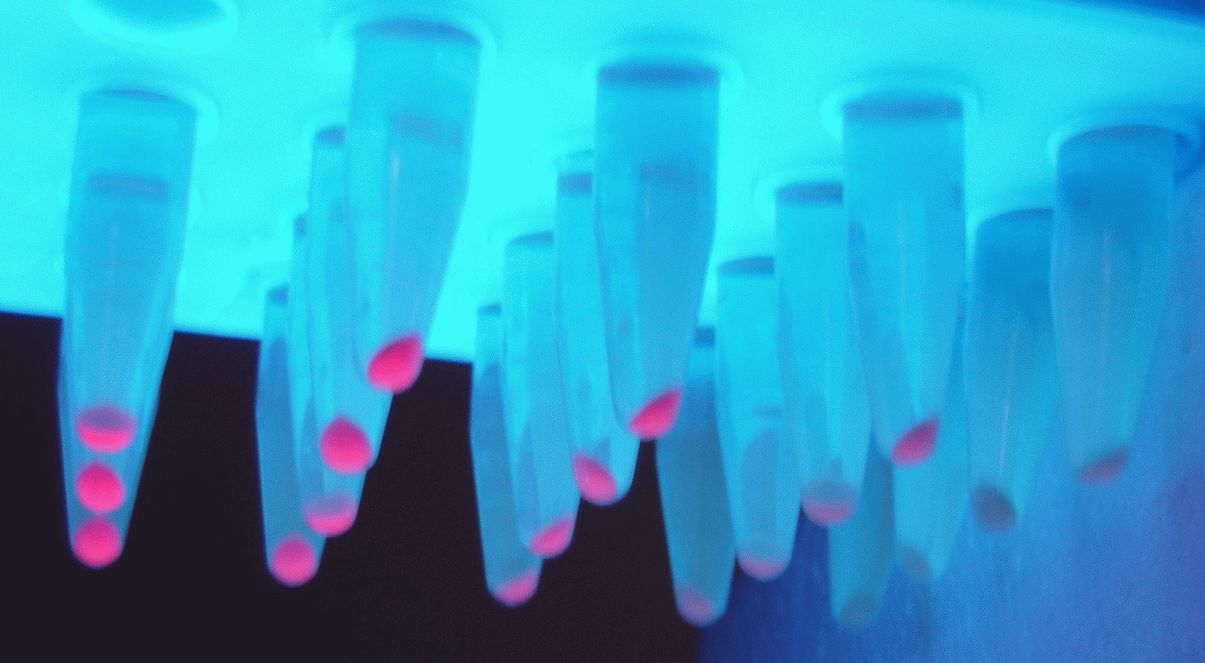
UT Austin iGEM 2019: Characterization of metabolic burden of the Anderson SeriesDescriptionThe 2019 UT Austin iGEM team transformed the Anderson Series promoters into our 'burden monitor' DH10B strain of E. coli, which contains a constitutive GFP cassette in the genome of the cell. GFP expression fluctuates depending on the number of ribosomes available. Using this strain, we characterized the relative burden (percent reduction in growth rate) of each Anderson Series part. Our results showed a range of growth rate reductions for each of these parts due to ribosomal reallocation from the genome of the host cell, towards the expression of RFP. Anderson Series parts with strong promoters are depicted with darker red colors and Anderson Series parts with weak promoters are depicted with lighter pink colors to show relative RFP expression. We saw a positive correlation between relative promoter strength and metabolic burden; parts with stronger promoters expressed less GFP and had a lower growth rate than parts with weaker promoters. The regression line for the graph below was constructed by measuring the burden of 5 parts that were created by the 2019 UT Austin iGEM team that each contained an Anderson Series promoter (BBa_J23104 or BBa_J23110), an RBS of varying strength, and a BFP reporter. For more information on characterization of these parts through the burden monitor, visit our team’s wiki page: [1]
Importance of Characterizing BurdenAlthough often we cannot avoid using a specific burdensome part, knowing in advance that it is burdensome, and that it has a high chance of mutating into a non-functional genetic device, can help with troubleshooting and coming up with alternatives. In the specific case of fluorescent protein-expressing devices, Fluorescence-activated cell sorting (FACS) can be used to filter out individual cells that meet a certain fluorescence threshold. This way, the cells expressing lower levels of the fluorescent protein are weeded out of the population. |
//direction/forward
//promoter/anderson
//regulation/constitutive
//rnap/prokaryote/ecoli/sigma70
| negative_regulators | |
| positive_regulators |

 1 Registry Star


