Constructing any new BioBrick® standard construction plasmid starting from the BioBrick® base vector requires just two assembly steps.
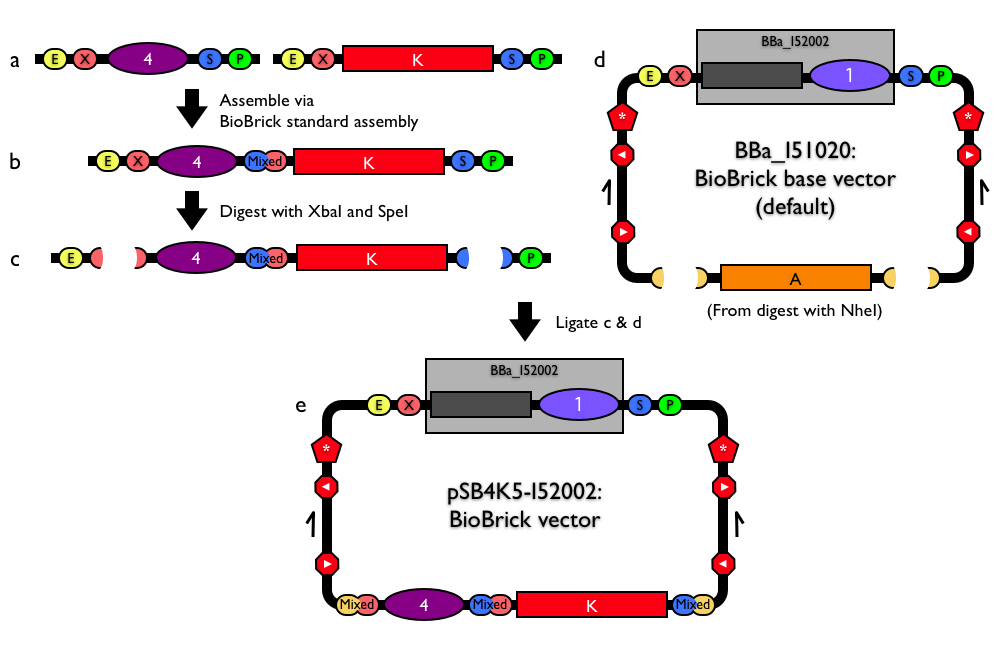 Figure 1: Schematic diagram of procedure to construct new BioBrick® vectors from the BioBrick® base vector. Click the image to view a larger schematic diagram describing how to build new BioBrick® vectors from the BioBrick® base vector. |
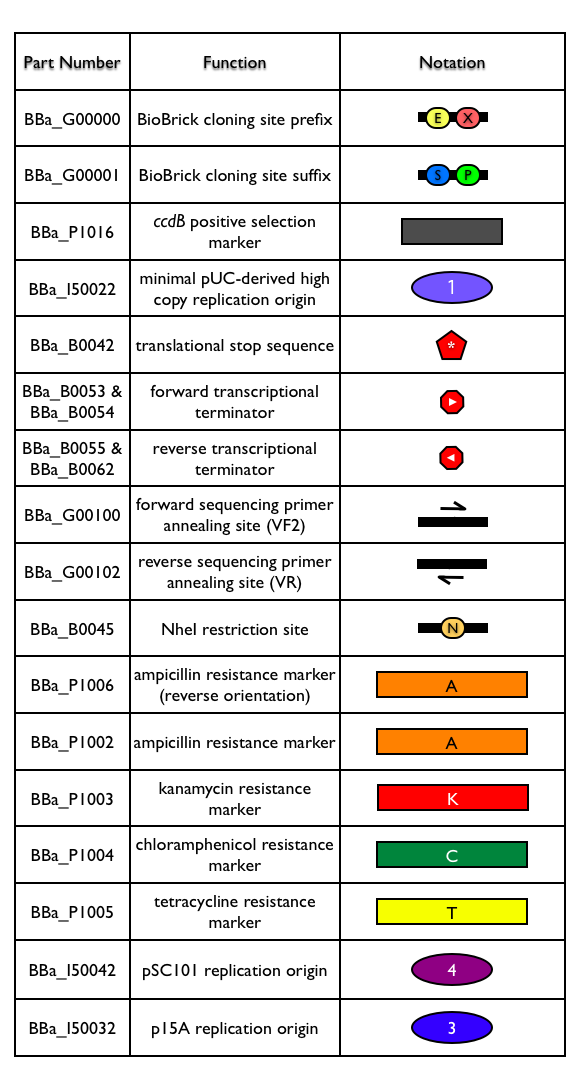 Figure 2: BioBrick® vector parts. |
- Design your replication origin(s) and antibiotic resistance marker(s) as BioBrick® standard biological parts (Figure 1a).
- Assemble the origin and antibiotic resistance marker via BioBrick® standard assembly (first assembly step, Figure 1b).
- Digest the resulting composite part with restriction enzymes XbaI and SpeI (Figure 1c).
- Digest the BioBrick® base vector BBa_I51020 with NheI to excise the ampicillin resistance marker BBa_P1006 (Figure 1d).
- Since NheI, XbaI and SpeI all generate compatible DNA ends, you can then ligate the composite origin and resistance marker to the linearized base vector (second assembly step).
- The ligation product of the composite part and linearized base vector is a functional BioBrick® standard vector (Figure 1e). Although the ligation to make the BioBrick® construction plasmid is not directional, the resulting construction plasmid should be functional regardless.
|
This plasmid construction approach enables reuse of replication origins and antibiotic resistance markers available from the Registry of Standard Biological Parts. Use of the base vector to construct all BioBrick® standard construction plasmids ensures standardization and uniformity in any resulting BioBrick® vectors.


