Difference between revisions of "Help:2011 Distribution Creation Handbook"
(→Quality Control) |
m |
||
| (9 intermediate revisions by 4 users not shown) | |||
| Line 1: | Line 1: | ||
| + | [[Category:Distribution Kit]] | ||
| + | {{TOCright}} | ||
| + | |||
='''Planning'''= | ='''Planning'''= | ||
| − | iGEM HQ took a look at the most used and most requested parts from last year… Then we made a plan! We picked plates with the parts that teams wanted and made new plates to include popular parts. The majority of the 2011 distribution was a replica of the 2009 distribution parts, with some more recent popular additions. Those parts became the parts plates that iGEMers receive at the beginning of the summer! | + | iGEM HQ took a look at the most used and most requested parts from last year… Then we made a plan! We picked plates with the parts that teams wanted and made new plates to include popular parts from last year. The majority of the 2011 distribution was a replica of the 2009 distribution parts, with some more recent popular additions. Those parts became the parts plates that iGEMers receive at the beginning of the summer! |
We then made [https://static.igem.org/mediawiki/parts/f/fa/2011_Distribution_Plan_-_Mar-Apr.pdf a plan], or timeline, of how distribution would proceed. Of course, nothing ever goes exactly as you plan it, and the calendar for the 2011 distribution ended up looking more like [https://static.igem.org/mediawiki/parts/a/a8/2011_Distribution_Calendar_ACTUAL_-_Mar-May.pdf this]. | We then made [https://static.igem.org/mediawiki/parts/f/fa/2011_Distribution_Plan_-_Mar-Apr.pdf a plan], or timeline, of how distribution would proceed. Of course, nothing ever goes exactly as you plan it, and the calendar for the 2011 distribution ended up looking more like [https://static.igem.org/mediawiki/parts/a/a8/2011_Distribution_Calendar_ACTUAL_-_Mar-May.pdf this]. | ||
| Line 68: | Line 71: | ||
The Dilution plate is stored in the -20C freezer until it is ready to be processed. | The Dilution plate is stored in the -20C freezer until it is ready to be processed. | ||
| + | |||
| + | |||
| + | ==Restriction Digests== | ||
| + | |||
| + | The Digest plate was used for performing a double digest with EcoRI and PstI. | ||
| + | |||
| + | A master mix including buffer 2, BSA, and the two restriction enzymes was prepared on ice and aliquoted to the Digest plate. All reagents were purchased from NE Biolabs. Plates were then incubated in either a PCR machine or an RT-PCR machine using the standard digest protocol: 30 min at 37 degrees, 20 min at 80 degrees, hold at 4 degrees. The digest results were subsequently diluted and run on 48-well E-gels (Invitrogen). | ||
| + | |||
| + | We currently have two gel stations, allowing us to run one complete Digest plate at a time. Due to the spacing of the channels on the multichannel pipette, samples are loaded into the gel in a specific alternating manner. 2-log ladder (NE Biolabs) was diluted to 1x and used as a marker in the first and last lanes of each row. Each gel ran for 24 minutes using a preset program on the gel stations. Gels were immediately imaged upon completion using the AlphaEaseFC program with our standard parameters. Images with exposure times of 15 seconds and 30 seconds were acquired. | ||
| + | |||
| + | The gel images with 15 sec exposure times were uploaded to the appropriate Submissions page, and used to determine insert size ("Insert Result"), DNA quantity ("Plasmid Quantity"), and backbone size ("Plasmid Quality"). Insert Results were marked "OK" if the band sizes corresponded to insert length, "BAD" if the band size was incorrect, and "???" if multiple bands appeared or if the band size was questionable. Plasmid Quantity was marked "OK" if strong bands appeared, "LOW" if faint bands appeared, "HIGH" if very strong bands appeared, and "None" if no bands appeared. Plasmid Quality was marked "OK" if the backbone band was the correct size and "BAD" if the backbone band was the incorrect size. | ||
| Line 140: | Line 154: | ||
*The PlateMate Plus program used this year was recreated from last year's in a very short amount of time and with little quality control. This was due to the computer that operates the robot being reformatted without our knowledge. The program is functional, but not eloquent and could probably be revised to be more efficient. | *The PlateMate Plus program used this year was recreated from last year's in a very short amount of time and with little quality control. This was due to the computer that operates the robot being reformatted without our knowledge. The program is functional, but not eloquent and could probably be revised to be more efficient. | ||
| + | |||
| + | *Some countries have very strict importation laws. Mexico and Australia are notable. Please refer to the special Help page on [https://igem.org/Help:Special_Shipping_Instructions Special Shipping Instructions] before distribution to view any special cases and how to deal with each while shipping. | ||
==Recipes== | ==Recipes== | ||
Latest revision as of 15:26, 14 June 2017
Planning
iGEM HQ took a look at the most used and most requested parts from last year… Then we made a plan! We picked plates with the parts that teams wanted and made new plates to include popular parts from last year. The majority of the 2011 distribution was a replica of the 2009 distribution parts, with some more recent popular additions. Those parts became the parts plates that iGEMers receive at the beginning of the summer!
We then made a plan, or timeline, of how distribution would proceed. Of course, nothing ever goes exactly as you plan it, and the calendar for the 2011 distribution ended up looking more like this.
Growing
For plates that we already had in storage from previous years, the growing process went pretty quickly.
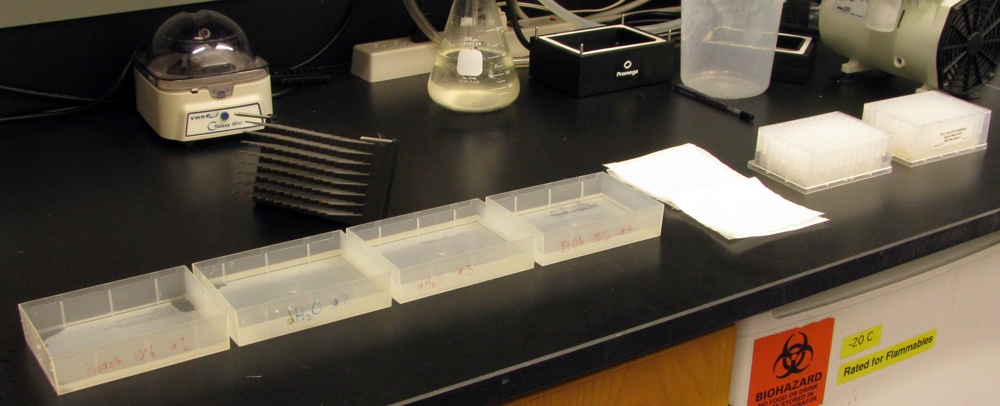
First, we located the glycerol stocks from last year. We plotted the antibiotic layout for each plate, then aliquoted the appropriate antibiotic into each well. Four antibiotic test plates were prepared for each source plate, to ensure that the antibiotics were acting as expected and to do some quality control. We also made Glycerol plates to store as stocks and MiniPrep plates to use in the process of continuing forward with the distribution plates.
MiniPrep plates were prepared with 1.8ml LB Broth and the correct antibiotic. Glycerol plates were prepared with 300. ul LB Broth with the correct antibiotic and 37.5 ul 80% glycerol. The Antibiotic Test plates were prepared with 500.ul LB Broth with the correct antibiotic. We prepared plates with Ampicillin, Chloramphenicol, Kanamycin and Tetracycline as these are the most common antibiotics used for iGEM stocks.
For plates that we had a copy in Glycerol Stock form (i.e., plates from previous years), we used a pin tool to inoculate the MiniPrep, Glycerol and AB Test plates. The tool was cleaned between each inoculation to prevent contamination. Because of the careful cleaning steps that needed to be taken to avoid any sort of contamination, this process can take upwards of three hours. After inoculation, the plates were incubated at 37C. Miniprep plates and AB Test plates were incubated for 16 hours, Glycerol plates for 12 hours. Glycerol and AB Test plates were in a shaker rotating at 320 rpm. The shaker that the MiniPrep plates are incubated was originally at a speed of 680 rpm. However, it had a tendency to shake quite vigorously. This resulted in some cross-contamination between wells, causing us to have to go back and redo the plate (this year, plates 4000 and 4004 were effected) and delay progress. Growth did not seem to be hindered by lowering the shaker speed, and doing so seemed to eliminate the problem of cross-contamination. The result is that we lowered the speed for plates after plate 4004 to 600 rpm.
For newly prepared plates containing new parts, we first needed to transform and grow up colonies. Colonies were picked from Petri dishes inoculated with the correct antibiotic. We then took the colonies and distributed them into the allotted location on a staging plate with the appropriate AB broth. That plate then became the staging plate from which we could inoculate the MiniPrep, Glycerol and AB Test Plates, as before.
Synopsis
- Remove Glycerol stocks from -80C freezer and thaw on ice for 1.5-2 hours
- Label plates and prep work area
- Prepare plates:
- 4 MiniPrep plates with 1.8ml of LB (w/ appropriate AB)
- 2 Glycerol plates with 37ul of 80% glycerol and 300ul of LB (w/ appopriate AB)
- 4 AB Test Plates with 500ul of Amp, Cm, Kan, and Tet, respectively
- Inoculate each plate from the Source plate, thoroughly cleaning after each use
- When all the plates are done, return Glycerol plate to the -80C freezer
- Total time for this process: ~3hr
- Incubate MiniPrep and AB Test plates for 16 hours at 37C in a shaker
- Incubate Glycerol plates for 12 hours at 37C in a shaker
2011 Growing and Inoculation Checklist
Imaging and Preliminary QC
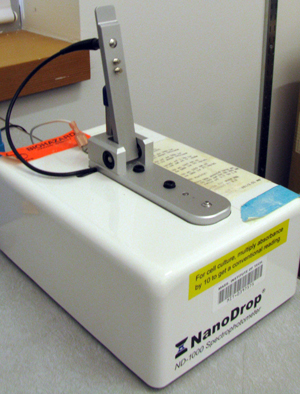
After incubation, the MiniPrep and Glycerol plates are OD tested to verify cell concentration. An absorbance of around 2-3 nm was expected for the MiniPrep plates and around 1 nm for the Glycerol plates.The Glycerol plates are then stored in a -80C freezer. The AB Test and MiniPrep plates are pelleted and an image is taken of each plate. We compare these images to the AB array and double check that colonies are only growing in wells where they are meant to grow. These images are posted to the DNA Repository for 2011 as part of our open quality control process.
Synopsis
- Remove plates from incubators and OD the Glycerol and MiniPrep plates
- Pellet and image the MiniPrep and AB Test plates, post the results on the Parts Registry
- Results should be the same as previous years' plates.
- Store Glycerol plates at -80C and AB Test / Miniprep plates at 4C
2011 Cell Culture and Imaging Checklist
MiniPrepping
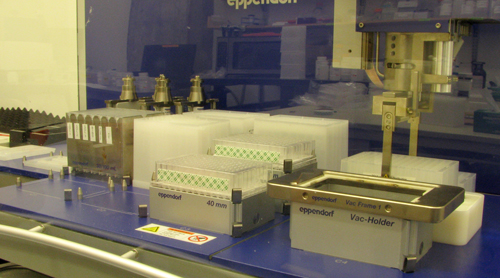
Our fabulous epMotion robot does the hard part of MiniPrepping. We used 5 Prime Perfectprep Plasmid 96 Vac Kits to run the minipreps on our robot. We eluted each time with 1x TE instead of elution buffer. After the run, each MiniPrep plate is combined into one Reserve plate. The Reserve plate serves as a staging plate for the Digests, Sequencing and Dilution plates. As fabulous as the robot was, it did have a few faults. Many of these seemed to involve moving plates with the gripper arm. Occasionally, a plate would be dropped or not picked up at all. We used double-sided foam tape along the sides of the filter plates to add grip to the plastic plates. This seemed to work the majority of the time, but due to the errors incurred we still maintained a watch of the robot during the process. Twice, the gripper moved plates and did not align them on the vacuum manifold properly, resulting in spill over of reagents and resulting in our having to start the process over from the beginning. All of these mishaps meant that the robot had to be carefully monitored during runs.
After the plates are combined, the Reserve plate is also OD tested for quality control. For each MiniPrep run, we had an assumed final volume of 50ul at a concentration of 20ng/ul. In the combined plate, we therefore had 200ul total at the end of four runs. We had an expected outcome of an average 20ng/ul in each sample, but results varied greatly: from 10ng.ul to over 100ng/ul! After ODing, the Reserve plate was placed in the -20C freezer for storage until the Digest, DNA Dilution and Sequencing plates could be aliquoted out.If you do not have a robot to do all this tough work for you, you can refer to [http://www.parts.igem.org/Help:Protocols/Miniprepping this page] for the protocol.
If you do have a fabulous epMotion robot, the program we used to MiniPrep the plates can be found here.
Synopsis
- Prep robot with appropriate amounts of reagents and other supplies
- Watch robot during run to ensure there are no errors
- Store Reserve plate in 4C refrigerator during runs and insert in appropriate location when program dictates
- When all runs are done, OD product with an expected result of 20ng/ul
- A single run should take ~1.5 hrs (including set up) for a total of ~6 hrs for four plates
Quality Control
After minipreping, the Reserve plate is aliquoted out into three plates for Quality Control checks and a Dilution plate to be used for making distribution kits if the QC results are good. The first plate is a Digest plate, so each part is Digested and run out on an agarose E-gel. The picture of the gel is posted on the Parts Registry, as well as a basic analysis of the results as part of our ongoing QC process. A Sequencing plate is also aliquoted from the reserve and is sent to an outside source for processing. We analyze the results for inconsistencies in the parts’ sequences. These tests, along with the AB test plates, are all part of our efforts to ensure that the parts received by teams are consistent and of the highest possible quality.
The Dilution plate is stored in the -20C freezer until it is ready to be processed.
Restriction Digests
The Digest plate was used for performing a double digest with EcoRI and PstI.
A master mix including buffer 2, BSA, and the two restriction enzymes was prepared on ice and aliquoted to the Digest plate. All reagents were purchased from NE Biolabs. Plates were then incubated in either a PCR machine or an RT-PCR machine using the standard digest protocol: 30 min at 37 degrees, 20 min at 80 degrees, hold at 4 degrees. The digest results were subsequently diluted and run on 48-well E-gels (Invitrogen).
We currently have two gel stations, allowing us to run one complete Digest plate at a time. Due to the spacing of the channels on the multichannel pipette, samples are loaded into the gel in a specific alternating manner. 2-log ladder (NE Biolabs) was diluted to 1x and used as a marker in the first and last lanes of each row. Each gel ran for 24 minutes using a preset program on the gel stations. Gels were immediately imaged upon completion using the AlphaEaseFC program with our standard parameters. Images with exposure times of 15 seconds and 30 seconds were acquired.
The gel images with 15 sec exposure times were uploaded to the appropriate Submissions page, and used to determine insert size ("Insert Result"), DNA quantity ("Plasmid Quantity"), and backbone size ("Plasmid Quality"). Insert Results were marked "OK" if the band sizes corresponded to insert length, "BAD" if the band size was incorrect, and "???" if multiple bands appeared or if the band size was questionable. Plasmid Quantity was marked "OK" if strong bands appeared, "LOW" if faint bands appeared, "HIGH" if very strong bands appeared, and "None" if no bands appeared. Plasmid Quality was marked "OK" if the backbone band was the correct size and "BAD" if the backbone band was the incorrect size.
Synopsis
- The Reserve plate of the four combined MiniPrep products is aliquoted into three plates: Digest, Sequencing and DNA Dilution. The first two are for QC and the latter to create Kit Plates.
2011 Aliquot and Digest Checklist
The Birth of the Kit Plates
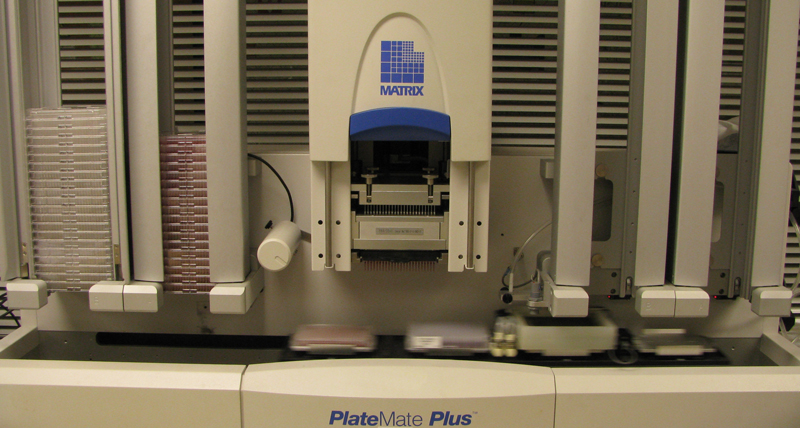
We once again utilized our fabulous epMotion ‘bot to prepare 384-well plates that were combinations of four 96-well Reserve plates and stained with 1% cresol red mixed with TE. Four copies of each Kit Plate were made for distribution. These plates were then copied hundreds of times using a Platemate Plus, a process that takes the robot hours to complete… And thus the 2011 DNA Distribution Kit Plates were born! 400 copies were made of each Kit Plate 1-4 and then the plates were dried, covered and stacked together. All by hand! The four Kit Plates were packaged together after drying and stored until the rest of the distribution kit was prepared.Once again, if you have a fabulous epMotion robot, the program to create the 384-well Kit Plates from 96-well Reserve plates is here. Otherwise, you're going to be doing a lot of pipetting!
Synopsis
- The epMotion bot combined four 96-well Reserve plates into one 384-well Kit Plate.
- Each run to combine four plates took ~1.5 hours
- The Kit Plates were then replicated, dried, sealed and prepared to be shipped.
- Each run to aliquot out 400 Kit Plates took 5 hrs.
- Drying took 2-3 days depending on humidity.
- Sealing and prepping took ~3 hrs per Kit Plate (x400)... A total of ~12 hours for Kit Plates 1-4 (1600 plates)
Plasmid Backbones
The backbones (pSB1A3, pSB1C3, pSB1K3 and pSB1T3) were manufactured using a plasmid template with the J04450 insert that was sequenced earlier in the process. This was used as a template in a PCR reaction to produce a high enough quantity of backbone to be shipped to all the teams. We used PCR Supermix High Fidelity to make a master mix, using 30 pmol of each primer and 100 ng of DNA. Primers were diluted first with 1X TE, but later diluted with water. This was aliquoted 100ul per well in 96 well PCR plate and ran the plate on the following thermocycler program:
- 95C/2 min
- 38x(95C/30s, 55C/30s, 68C/3 min)
- 68C/10 min
- 4C/forever
The total program takes about 4 hours.
1ul of the product was run out on a gel and ODed for quality control. We then purified the product using Promega SV96 cleanup, once again using 1x TE to elute. We ODed the purified product, with an expected yield of ~40ng/ul. The product was combined and adjusted to be at ~25ng/ul.We then ran digest and ligation tests to determine EcoRI and PstI cutting and ligation efficiency. 1ul of the product was transformed using competent cells and grown up on the appropriate antibiotic plate. Colonies were observed and counted to determine transformation efficiency.
Only after all of these tests were successful, 50 ul of each backbone is aliquoted into the individual vials. Beware! Aliquoting out that many samples takes time… Especially factoring in un-screwing all the caps for the vials! Using a multichannel pipetteman will help, especially using this tip array. With that array, you can organize vials onto 96-well racks and load four vials at a time.
For the full Linearized Backbone protocol, please refer to [http://www.parts.igem.org/Help:Protocols/Linearized_Plasmid_Backbones this page.]
For more information on how to transform competent cells, please refer to [http://www.parts.igem.org/Help:Transformation_Protocol this page.]
Synopsis
- Plasmid Backbones are manufactured using plasmid template from a J04450 insert
- A PCR is done to obtain a high concentration and volume of product
- The thermocylcer program took ~4.5 hrs to run
- 1ul of the product was then run on a gel and ODed to test concentration
- The product was purified, combined and ODed with an expected concentration of 40ng/ul
- The combined product is adjusted to 25 ng/ul using 1x TE
- A final OD and other QC tests verified the efficacy of the Plasmid Backbones
- This whole QC process took ~ 1.5 hrs
- 50ul of the purified product at 25ng/ul is aliquoted out into vials to be shipped to teams
- Aliquoting out ~1600 vials took ~ 4 hrs
Distribution
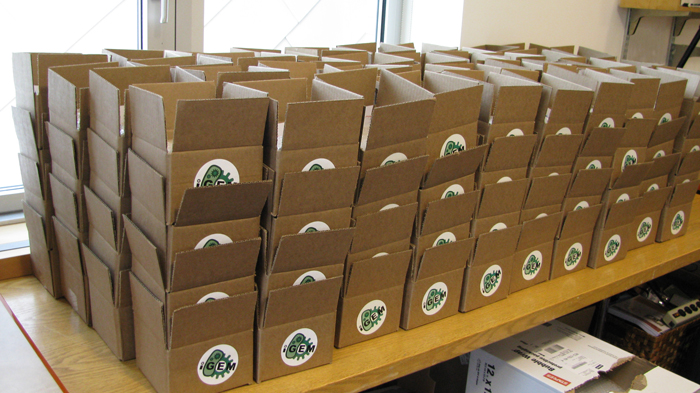
When the plates are all prepared, the plasmid backbones aliquoted, the Quality Control results deemed satisfactory, and everything is labeled and neat and tidy… We are ready for Distribution! The four Kit Plates, 50 ul of each plasmid backbone, some pretty stickers, pins and sponsor goodies all get compiled into one neat box and shipped out to all the teams and labs!!!
Appendix
Improvements/Notes
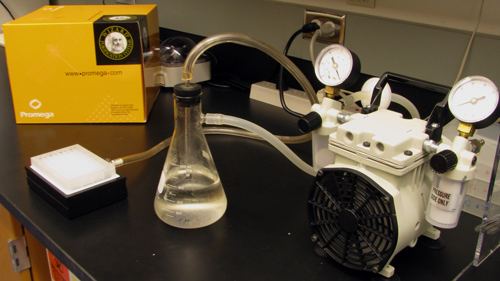
- The vacuum in our lab lost pressure quickly during the purification. We tried to judge as best we could when samples had been drawn through by sight. We also left the final drying step on for 10 minutes or more, to make sure the filter plates were completely dry and had no ethanol left in them before the final elution.
- The PlateMate Plus program used this year was recreated from last year's in a very short amount of time and with little quality control. This was due to the computer that operates the robot being reformatted without our knowledge. The program is functional, but not eloquent and could probably be revised to be more efficient.
- Some countries have very strict importation laws. Mexico and Australia are notable. Please refer to the special Help page on Special Shipping Instructions before distribution to view any special cases and how to deal with each while shipping.
Recipes
Cresol Red
- 1% dilution of cresol red in purified H2O and filter sterilized.
LB Broth
- 20g LB Broth in 1L purified H2O
- Autoclave at 121C for 20 min to sterilize
- Allow to cool to room temperature before adding antibiotics
LB Agar
- 35g LB Agar in 1L purified H2O
- Autoclave at 121C for 20 min to sterilize
- Stabilize at 55C before adding antibiotics and pouring
Antibiotic Stocks
- Ampicillin:
- 100 mg/mL in 50% EtOH
- Use 1ml in 1L to make LB stock
- Chloramphenicol:
- 35 mg/mL in 100% EtOH
- Use 1ml in 1L to make LB stock
- Kanamycin:
- 50 mg/ml in H2O
- Use 1ml in 1L to make LB stock
- Tetracycline:
- 5 mg/mL in 100% EtOH
- Use 3ml in 1L to make LB stock
100x PCR Master Mix
- 9.6ml of PCR Supermix High Fidelity
- 67 ul of primer SB-prep-2Eb
- 67 ul of primer SB-prep-3P-1
- 10 ul of template DNA at 10ng/ul (100ng total)
Sequences
Primer Sequences Used in PCR for Plasmid Backbones
- SB-prep-2Ea (prefix): ATGAATTCCAGAAATCATCCTTAGCG
- SB-prep-3P-1 (suffix): GCCGCTGCAGTCCGGCAAAAAA
Primers Used During QC for Sequencing
- VF2: TGCCACCTGACGTCTAAGAA
- VR: ATTACCGCCTTTGAGTGAGC
Supplies Needed
MiniPrepping and QC
| Catalog Number | Description | Multiple Runs (16 plates) | |
|---|---|---|---|
| 47744-124 | clear, skirted PCR Plate | 64 plates | |
| SR-L10F | 10ul Tip Racks | 32 boxes | |
| 3958 | 96 well Round Bottom Plates | 32 boxes | |
| 3960 | 96 well Deep Well Plates | 160 plates | |
| VWR 90003-118 | LB Broth | 16 L | |
| G8008-01 | 48w E-gels | 32 E-gels | |
| R0101L | Eco RI | 941 ul | |
| R0140L | PstI | 941 ul | |
| B9001S | BSA | 941 ul | |
| B7002 | NEB Buffer 2 | 4705 ul | |
| 5 Prime 2300220 | Perfectprep Plasmid 96 VAC | 50/pk Kit | |
| B00004Z498 | Double Sided Foam Tape | 10 rolls | |
| 960051017 | 100 ml epMotion Reservoirs | 30 | |
| 960050088 | 1ml epMotion Tip Racks | 160 boxes | |
| 17890 | 1X TE | 3 L | |
| RT-L1200F | 1.2ml MC Tip Racks | 32 boxes | |
| 60941-076 | Foil Covers | 515 sheets | |
| Nunc 250002 | Clear Universal Plate Lids | 515 lids |
Linearized Plasmid Backbone and QC
| Catalog Number | Description | Multiple Runs (10 runs) | |
|---|---|---|---|
| Invitrogen 10790-020 | PCR Supermix High Fidelity | 11 boxes (4 vials per box) | |
| SB-prep-3P | 1 vial at 100uM | ||
| SB-prep-2Ea | 1 vial at 100uM | ||
| 47744-124 | clear, skirted PCR Plate | 10 plates | |
| MJ Research, Inc MLP-9651 | 200 ul Plates | 10 plates | |
| Promega A9342 | Wizard® SV 96 PCR Clean-Up System | 1 Kit (8 runs) | |
| G501808 | E-gel 12-well | 1 box (18 gels) | |
| R0101L | Eco RI | 941 ul | |
| R0140L | PstI | 941 ul | |
| B9001S | BSA | 941 ul | |
| B7002 | NEB Buffer 2 | 4705 ul | |
| NEB M0202S | T4 DNA Ligase/Buffer | 20,000 units |
Distribution
| Catalog Number | Description | Total Needed (400 Kits) | |
|---|---|---|---|
| Nunc 265202 | 384-well plates w/ lid | 5 boxes (100 plates in each) | |
| VWR 10011-516 | Axygen 0.5 ml tubes, orange | pack 500 | |
| VWR 10011-520 | Axygen 0.5 ml tubes, red | pack 500 | |
| VWR 10011-512 | Axygen 0.5 ml tubes, green | pack 500 | |
| VWR 10011-526 | Axygen 0.5 ml tubes, yellow | pack 500 | |
| Nunc 534479 | Ampule Boxes | 1 Case | |
| MD664 | Cardboard Boxes | 12 packs (25per pack) | |
| Staples 468264 | Bubble Wrap | 4 boxes | |
| Staples 473975 | Packing Tape | 2 packs |
Other Suplies
| Catalog Number | Description | |
|---|---|---|
| Ethanol (200 proof) | ||
| Bleach | ||
| 87128-25G | Tetracylcine | |
| A9518-25G | Ampicilin | |
| K1637-5G | Kanamycin | |
| 87128-25G | Chloramphenicol | |
| 114F-FA0C00E | 3M Micropore Tape 3"x10 yds White | |
| TZ241 | P-Touch Labels (Black Print on White labels) | |
| 12000-806 | Inoculating Loops | |
| VWR 14217-726 | 20ul Tips | |
| VWR 14217-728 | 200ul Tips | |
| RT-L1200F | 1.2ml Multi Channel Tips | |
| SR-L10F | 10ul Multi Channel Tips | |
| SR-L250S/F | 250ul Multi Channel Tips | |
| L8-200 | Tips, 20 µl to 200 µl | |
| L8-50 | Tips, 5 µl to 50 µl | |
| 89094-658 | VWR Reservoirs | |
| BD 352095 | 15ml Conical Tubes | |
| 25384-250 | Petri Dishes |

